No matter how well your advance sales go, there are always people at the entrance without a ticket. That used to mean improvising: a separate cash box next to the scanner and a puzzle afterwards to make the numbers add up. With the point of sale in the check-in app you sell those tickets from the same iPhone or iPad you scan with — and the sale is recorded properly in your administration, instantly.
Where to find it
The point of sale lives on the inspector side of the app. Open an event the way you would for scanning and tap Kassa at the bottom of the screen. You don't need to enter a scan location first; the register works independently of the scanner.
It is available to every inspector assigned to the event — the same access that is required for scanning.
Step 1: pick the tickets
The register shows every active ticket type for your event, each with its current price and how many are still available. Availability is live: whatever the web shop is still allowed to sell at that moment, the register can sell too — sold out is sold out, at the door as well.
Use the plus and minus buttons to set quantities. You can combine multiple ticket types in a single sale — say two weekend tickets and a day ticket for one group. The ticket count and the running total update at the bottom.
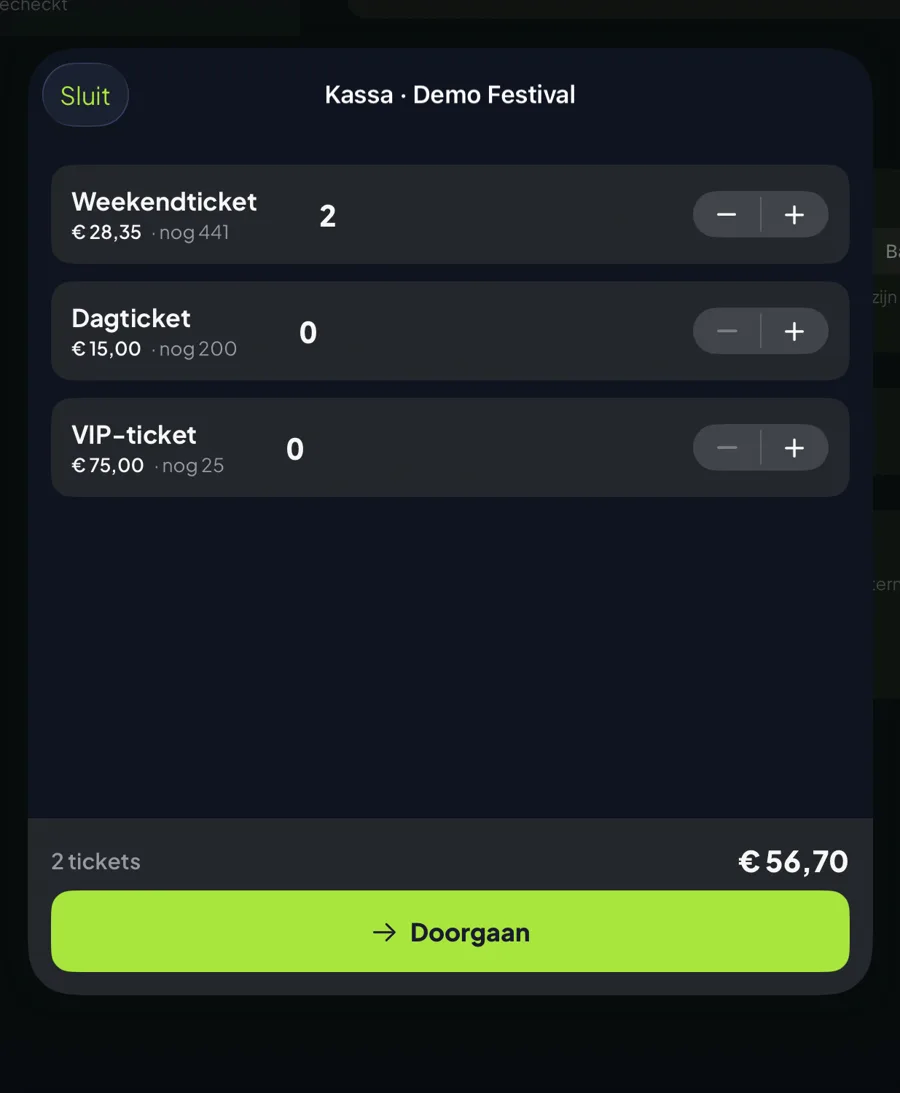
Tap Doorgaan (continue) once the order is complete.
Step 2: take payment — cash or card
You now see the total amount in large type. The payment itself happens outside the app: the visitor pays in cash or on the card terminal you have at the entrance. No payment runs through the platform on purpose — nothing to connect, and no transaction fees at the door.

Two options on this screen:
- Instant check-in is on by default: the buyer is already standing at the entrance and walks straight in — no scanning needed. Switch it off and the tickets simply remain scannable (useful when someone buys for somebody else or returns later).
- Email address (optional): fill it in and the buyer receives the tickets with QR codes by email — the same ticket confirmation as a web shop order.
Received the cash or the terminal confirmation? Tap Contant ontvangen (cash received) or PIN ontvangen (card received) and confirm. Only then are the tickets actually created.
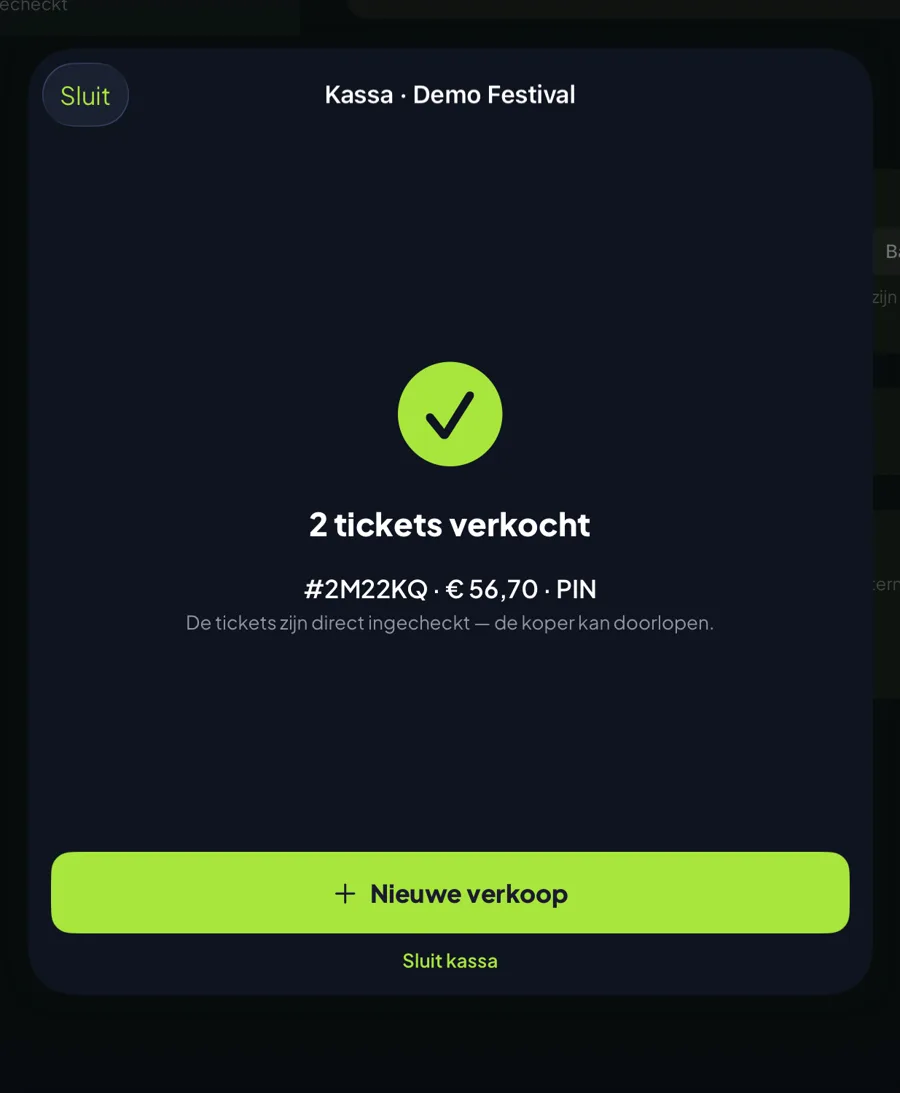
Step 3: the receipt
After completing the sale you see the confirmation: order number, amount and payment method. Nieuwe verkoop (new sale) puts you straight back at step 1 for the next visitor, with the counters and availability refreshed.
What lands in your administration?
A door sale is a full order, not an after-the-fact note:
- The order appears in your admin as paid, with the real amount and pos as its source.
- The payment method (cash or card) is stored on the order, so you can reconcile the till afterwards: filter on door sales and you see what came in per payment method.
- The sale counts towards revenue, dashboards and statistics, and web shop availability updates live — shared capacity between ticket types is guarded as well.
- With instant check-in the check-in is recorded in the name of the inspector who sold the tickets, including the register location — just like a regular scan.
Tips for the event night
- iPad on a stand? Combine the register with the scanner's kiosk mode: one station for scanning and selling at the entrance.
- Change: the app doesn't handle money, so bring a float if you accept cash.
- Free tickets (press, sponsors, artists) don't belong in the register but on the guest list in the admin — that creates tickets without a payment.
Short queues, a till that balances, and never again "card only, sorry" to a visitor holding cash.